
Maybe the Clone Stamp Tool is one of the most known tools in Photoshop, but have you ever wondered: what else can I do with the cloning stamp than duplicating pixels and hiding objects? These two short tutorials will show you some new uses for this wonderful tool.

Part One, Cloning a "Baby" Car
The Basics
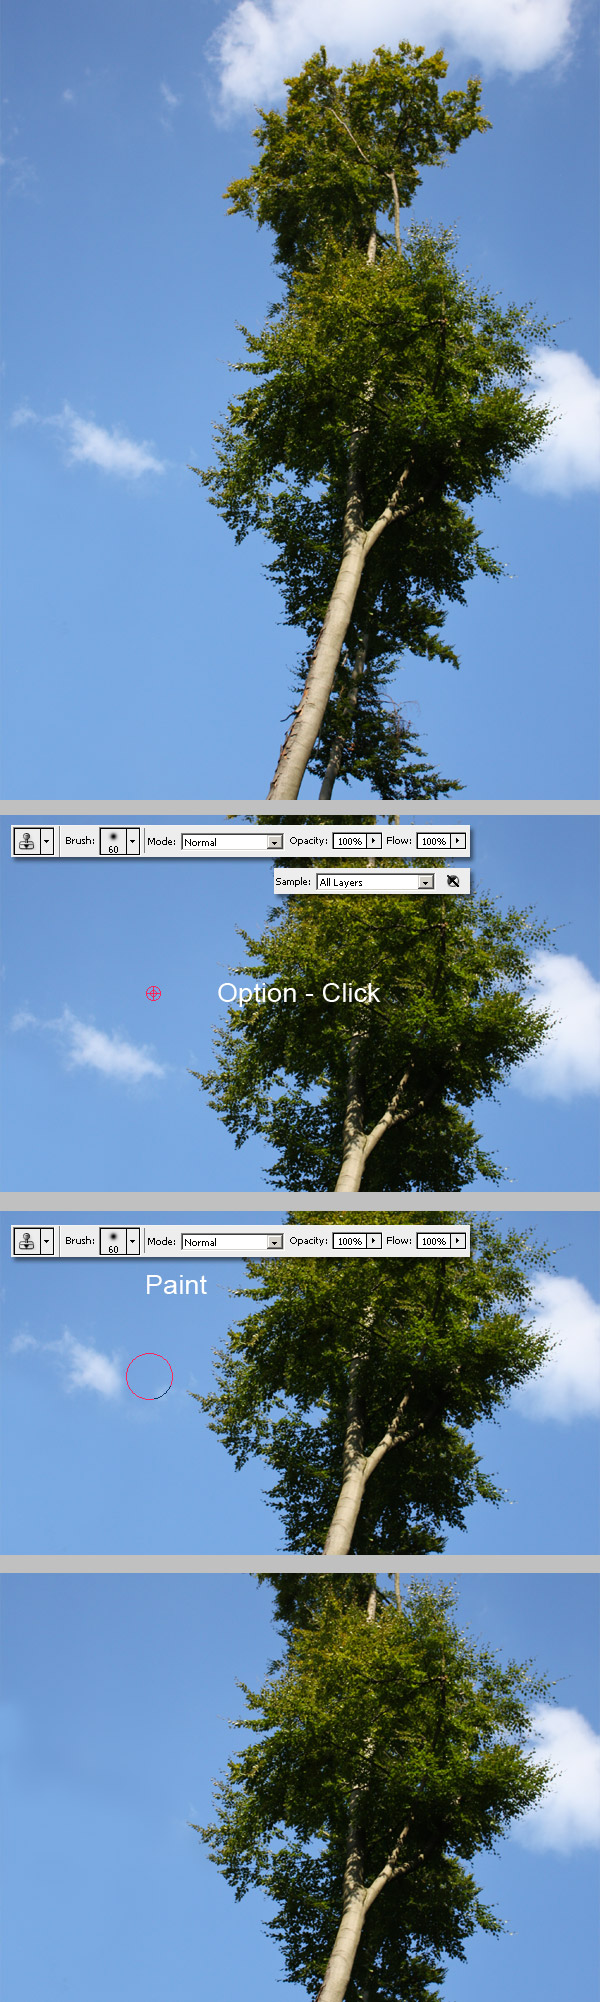
The Clone Stamp Tool is an awesome feature of Photoshop. It has been a part of the application for quite some time. The way to use this tool is really simple. First, select the brush type, choose the area you want to duplicate. Next press and hold only the Option key, and then click one time over the area that we call the Clone Source. Finally, just paint anywhere you want it.
You can clone from only one layer or several layers selecting the sample combo box. Also, you can paint the clone source on the original layer or into a new one. This tool is well known as the object remover, see the image below for a sample of the tool in action, which shows us how to remove a small cloud from a picture. Simple right? Let's go to something a little bit more complicated next.
Step 1
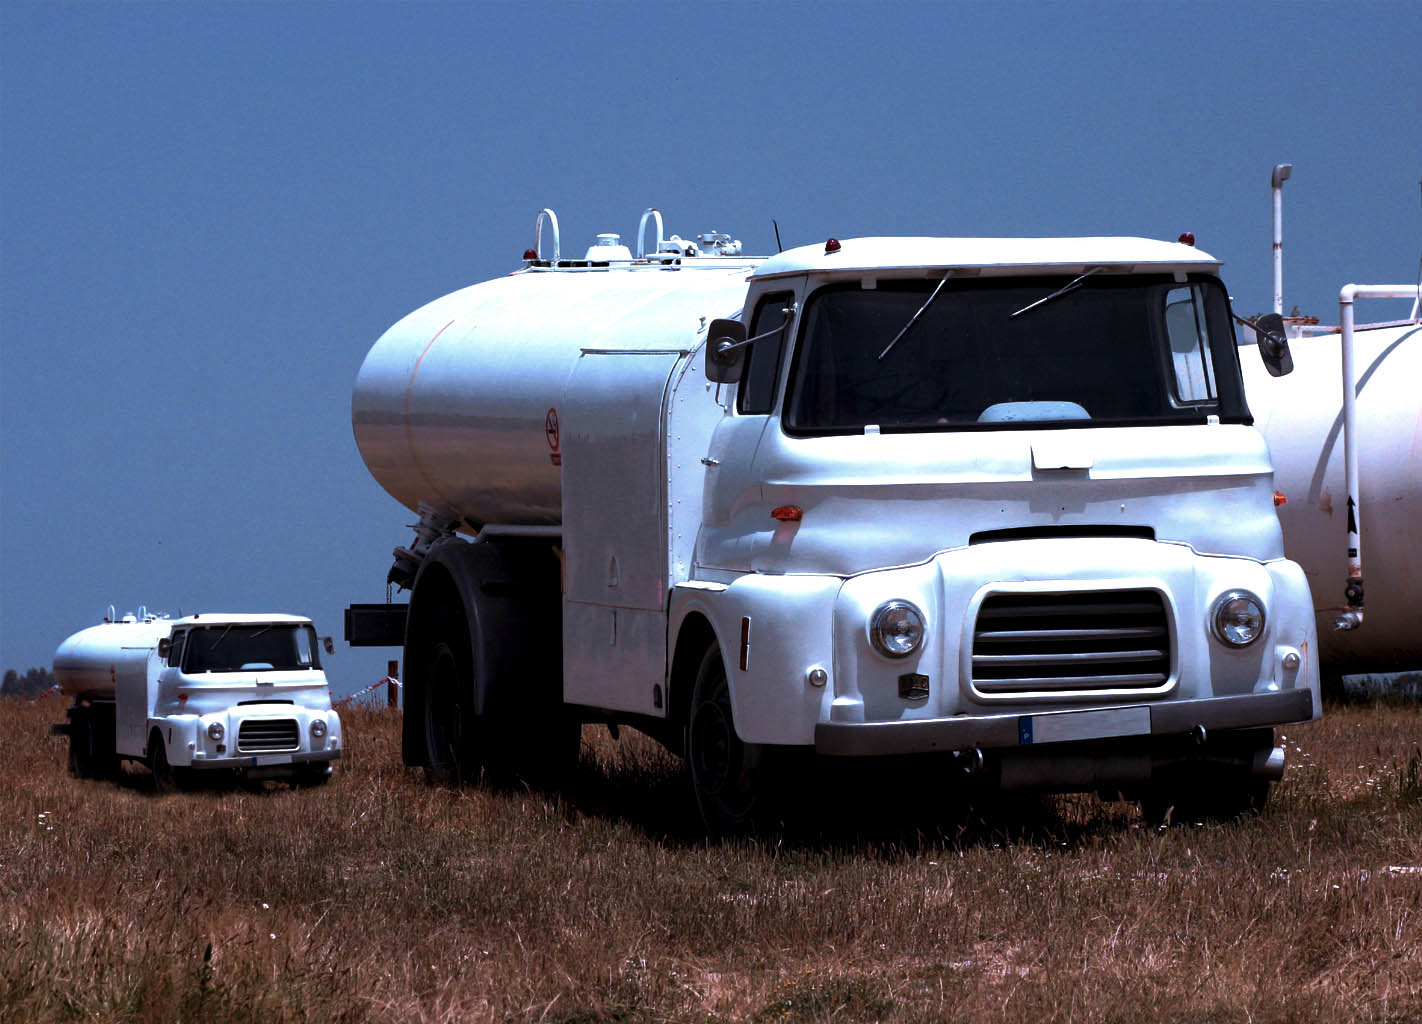
First, open your original picture. I'm using this one of an old white truck, then Go to File > Save as... and save it somewhere as a PSD. I pasted the image into a new document at 1422 pixels by 1024 pixels, but you can work in the original file size.
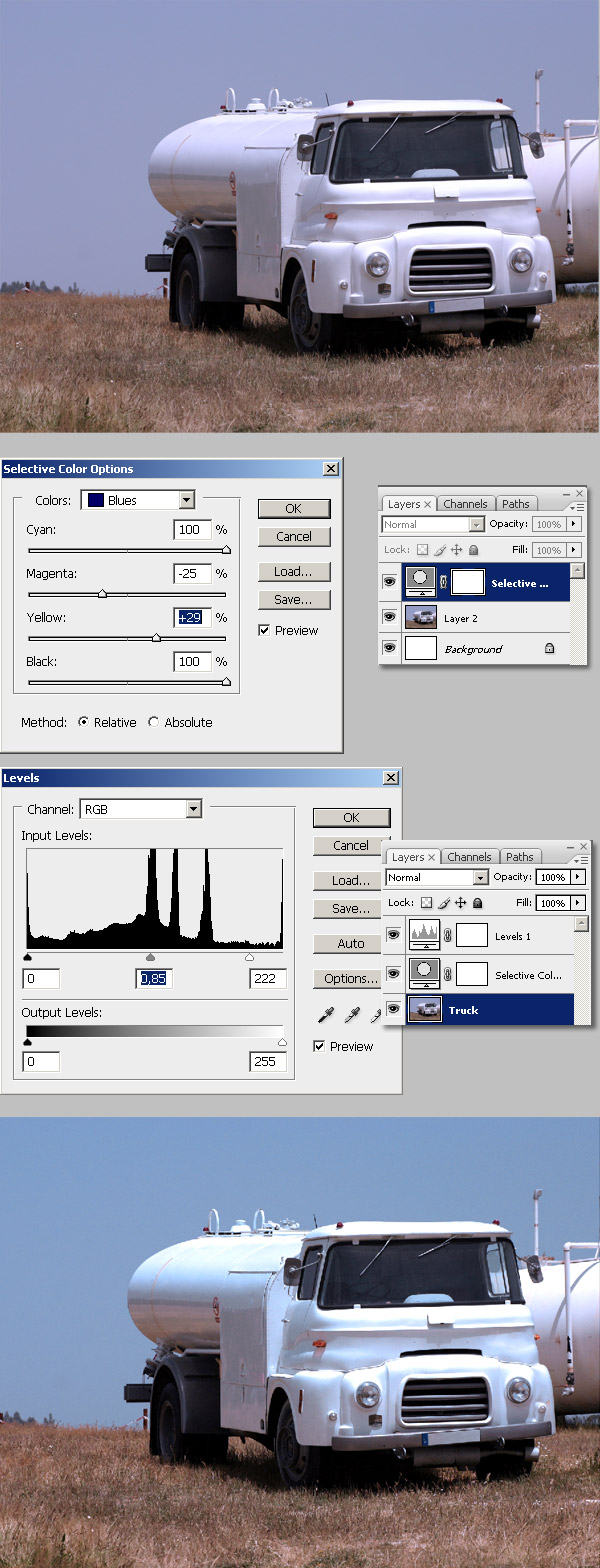
Actually, my picture looks a little bit purple, so I'll fix this by using two Adjustment Layers, a Selective color adjustment, only the blue color, and a Level Adjustment layer. Why adjustment layers? Well this way all the adjustments will be applied to any other layer on the document, but without distorting your original image. Name the image layer "Truck."
Step 3
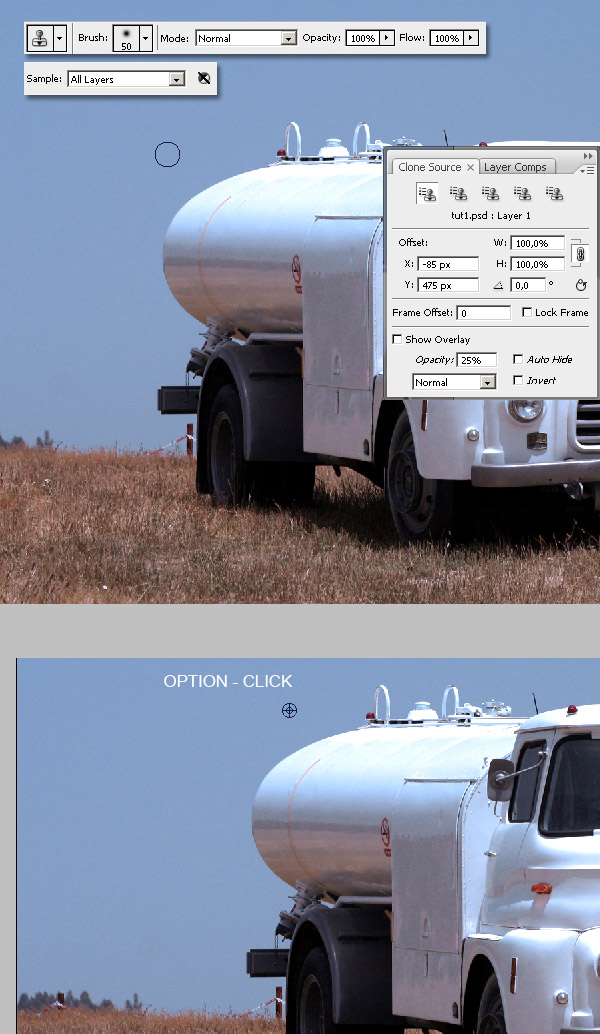
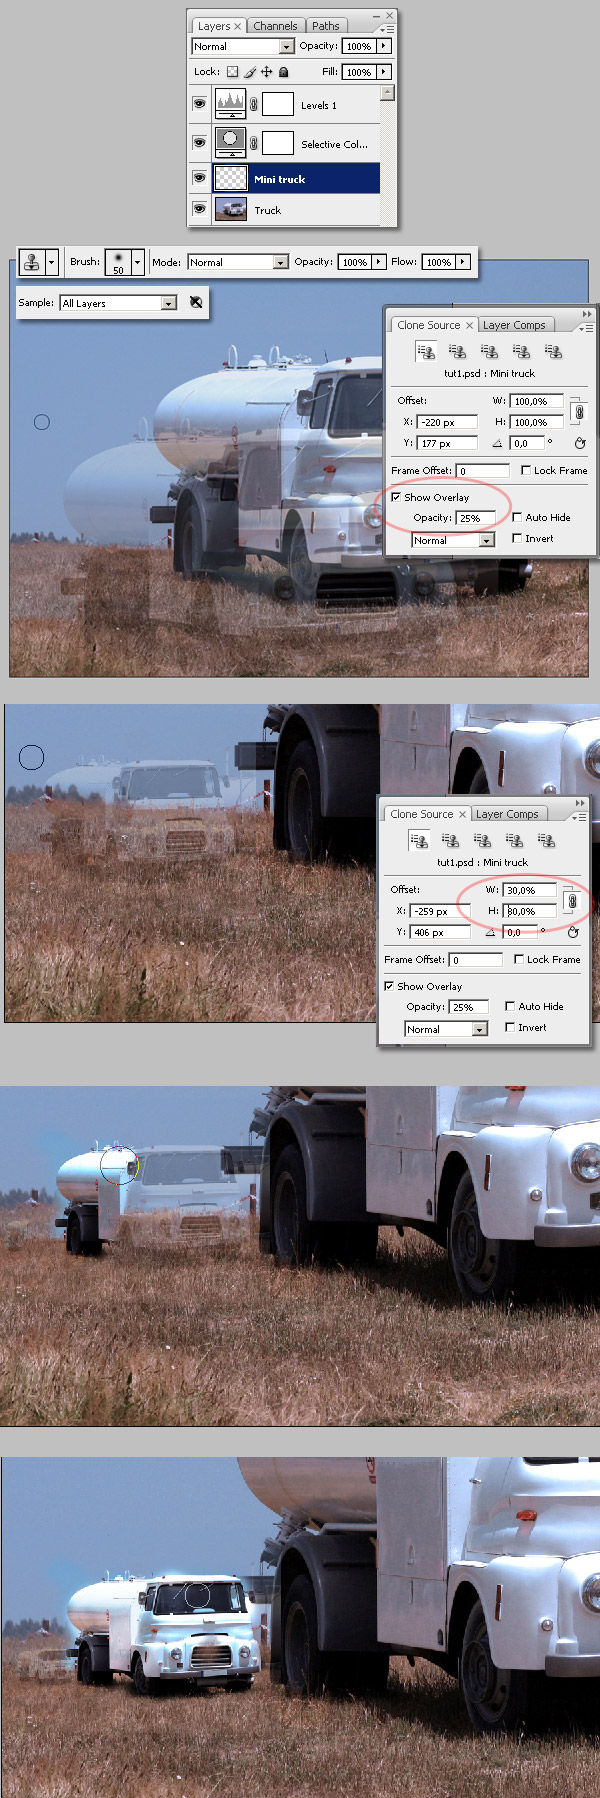
Now select the "Truck" layer in the Layers Palette and select the Clone Stamp Tool. Set the brush at around 50px and set the Hardness to 0%. Now to select the cloning source Alt-Click somewhere on your image, a good point is just at the top left of the truck. Also, go to Window > Clone source to show the advanced options.
Step 4
When you have selected your clone source, create a new layer above the "Truck" layer and name it "Mini truck." Go to the Clone Source window and mark the Show Overlay checkbox. This way you'll have a transparent copy of your clone source. Try moving your brush here an there to see how it works.
Now in the Clone source window, change these values W: 30% and H: 30%, this way you'll be resizing your clone source to 30% of the original size. Next, place the clone transparent overlay on a proper place and start painting until you duplicate the entire truck. Remember, you'll be painting on the "Mini truck" layer.
Step 5
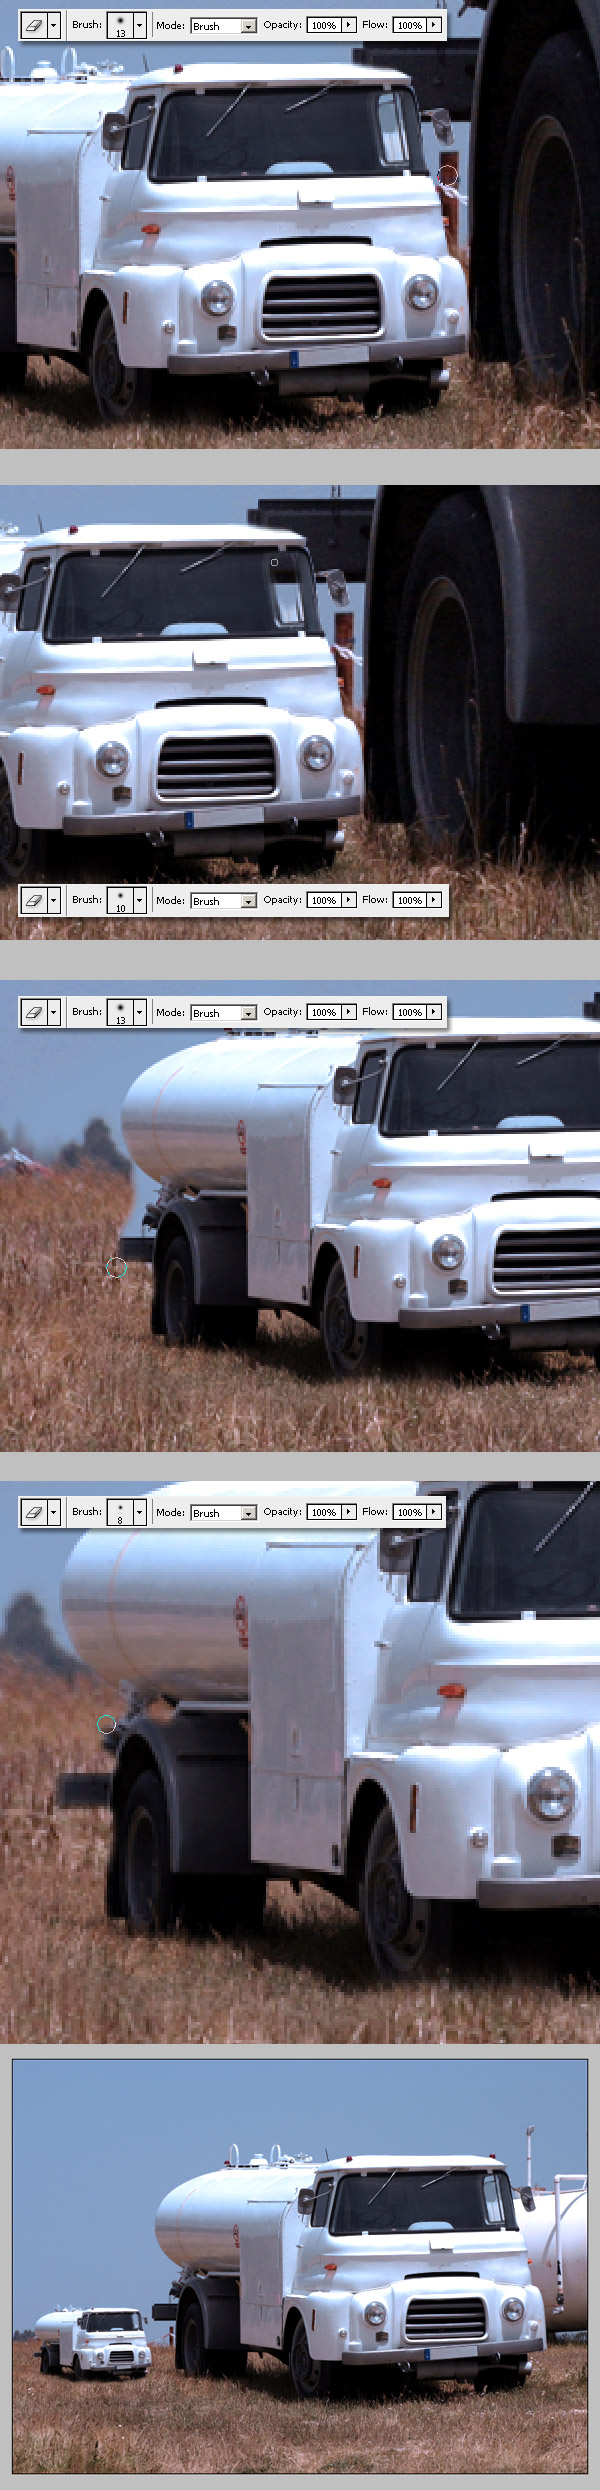
Now very carefully, using the Eraser Tool, delete all the dirt areas cloned around the "Mini Truck".
Step 6
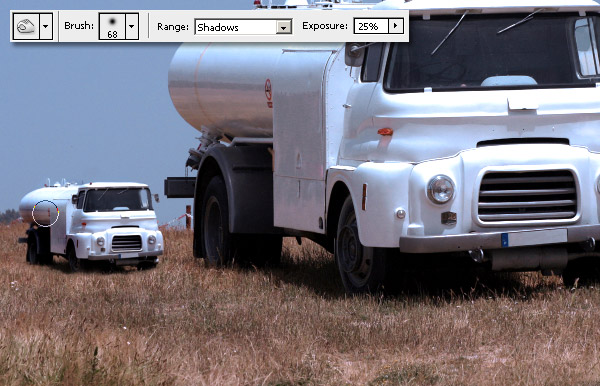
Now using the Burn tool, burn some areas of the "Mini truck" layer.
Step 7
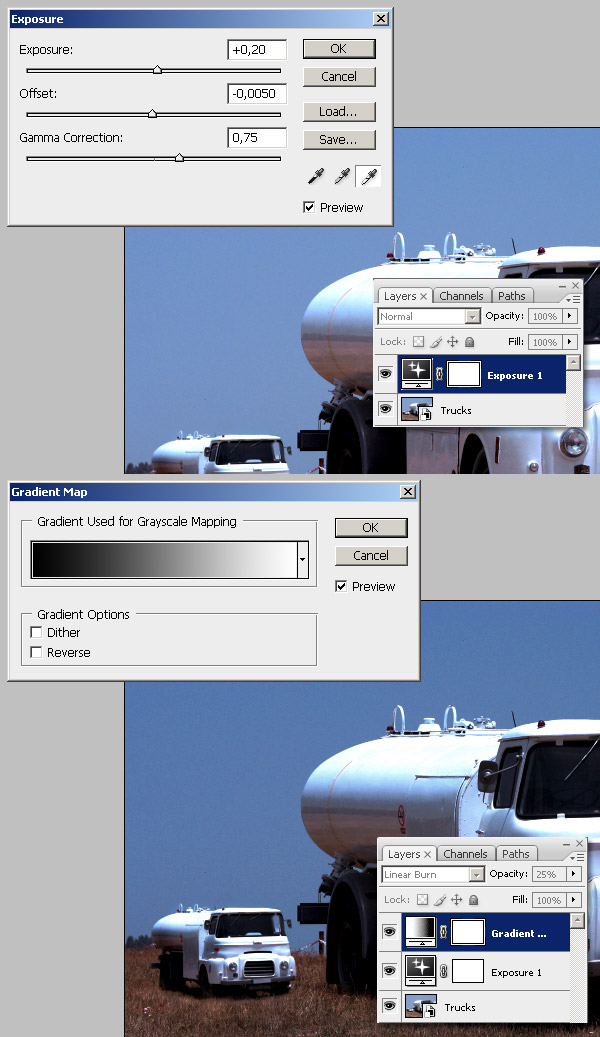
I'm adding two more Adjustments layers: a Exposure adjustment and a Gradient map (Blending Mode set to Linear Burn).
Part One Conclusion
And that's it, just to improve the distance sensation, blur the "Mini tuck" layer just a little bit by going to Filter > Blur > Blur.
Part Two, Straighten the Leaning Tower of Pisa
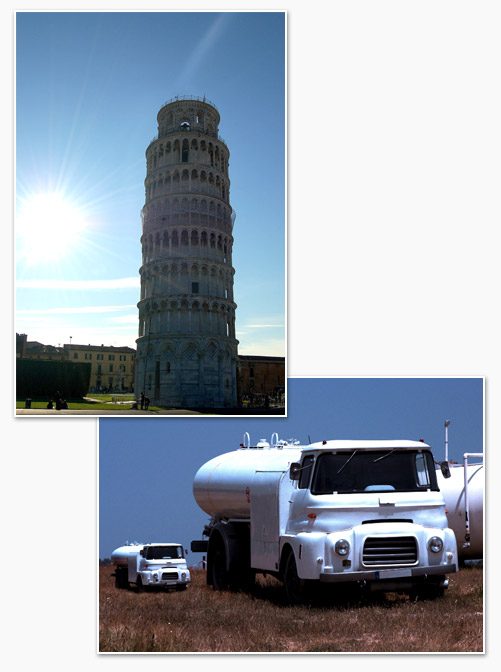
Before we get started, let's take a look at the image we'll be creating. Want access to full PSD files and downloadable copies of every tutorial, including this one? Join PSDTUTS PLUS for just $9/month. You can view the final image preview below or view a larger version here.

Step 1
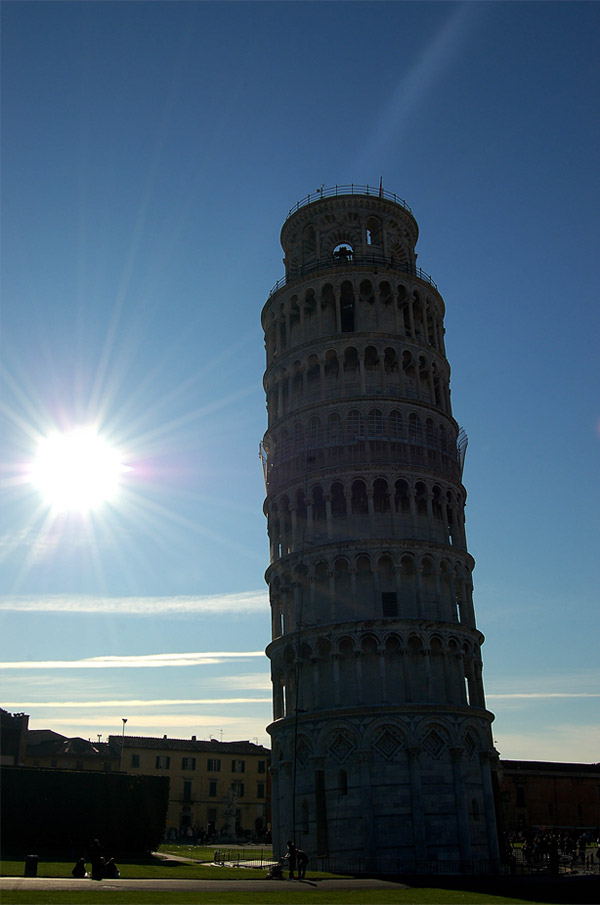
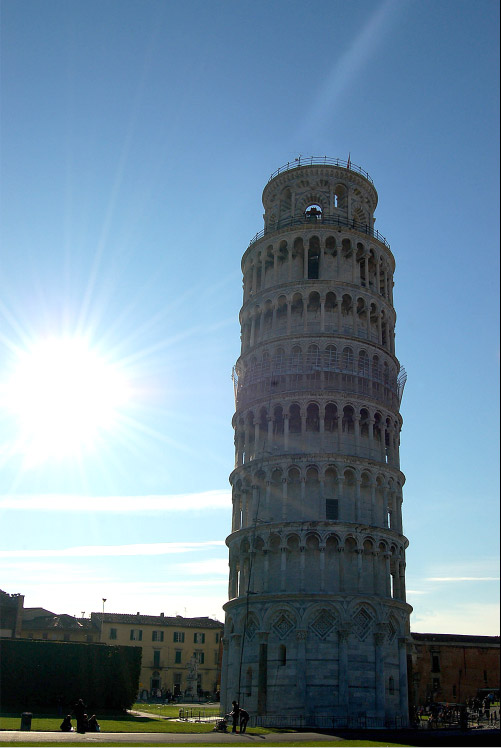
Everybody knows the famous Leaning Tower of Pisa, although intended to stand vertically, the tower began leaning to the southeast due to a poorly laid foundation. But now we have Photoshop to fix that leaning using only the Clone Stamp Tool.
First, find your favorite image of the tower, I've found this one. Open it and save it as a new PSD file somewhere. I pasted the image into a new document 1000 pixels by 1500 pixels, but you can work with the original file size.
Step 2
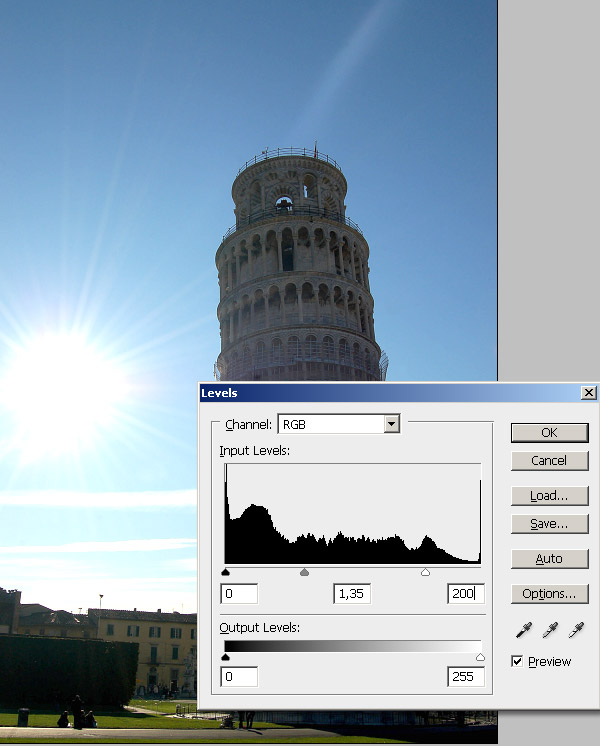
I'll increase the highlights levels of the tower. You can adjust your image according to your needs, or just skip this step if you're using another picture.
Step 3
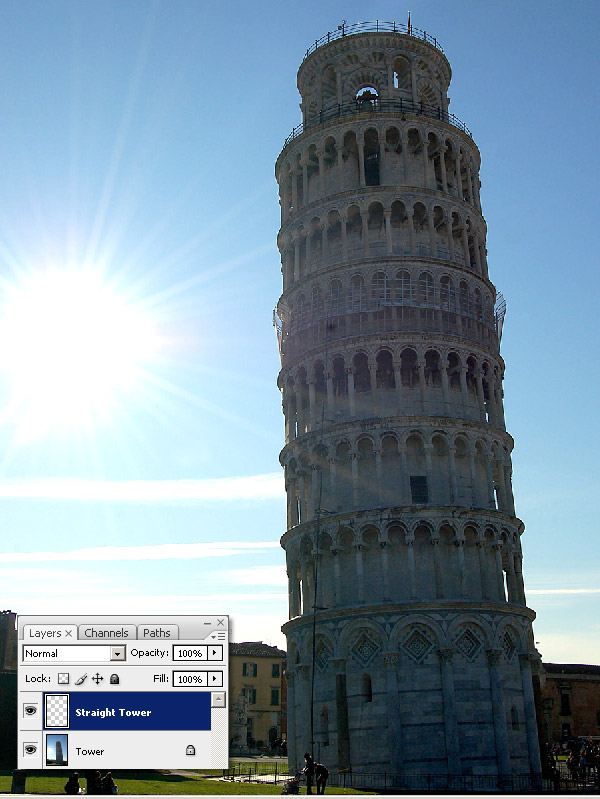
Once you have your image ready, create a new blank layer above the "Tower" layer and name it "Straight tower."
Step 4
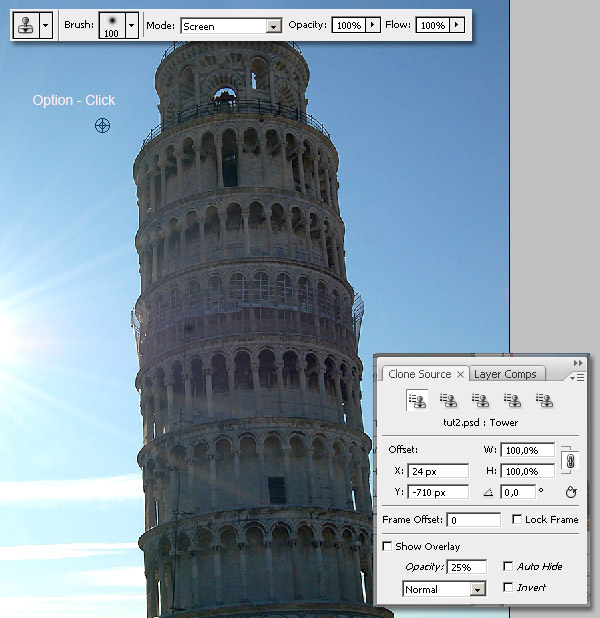
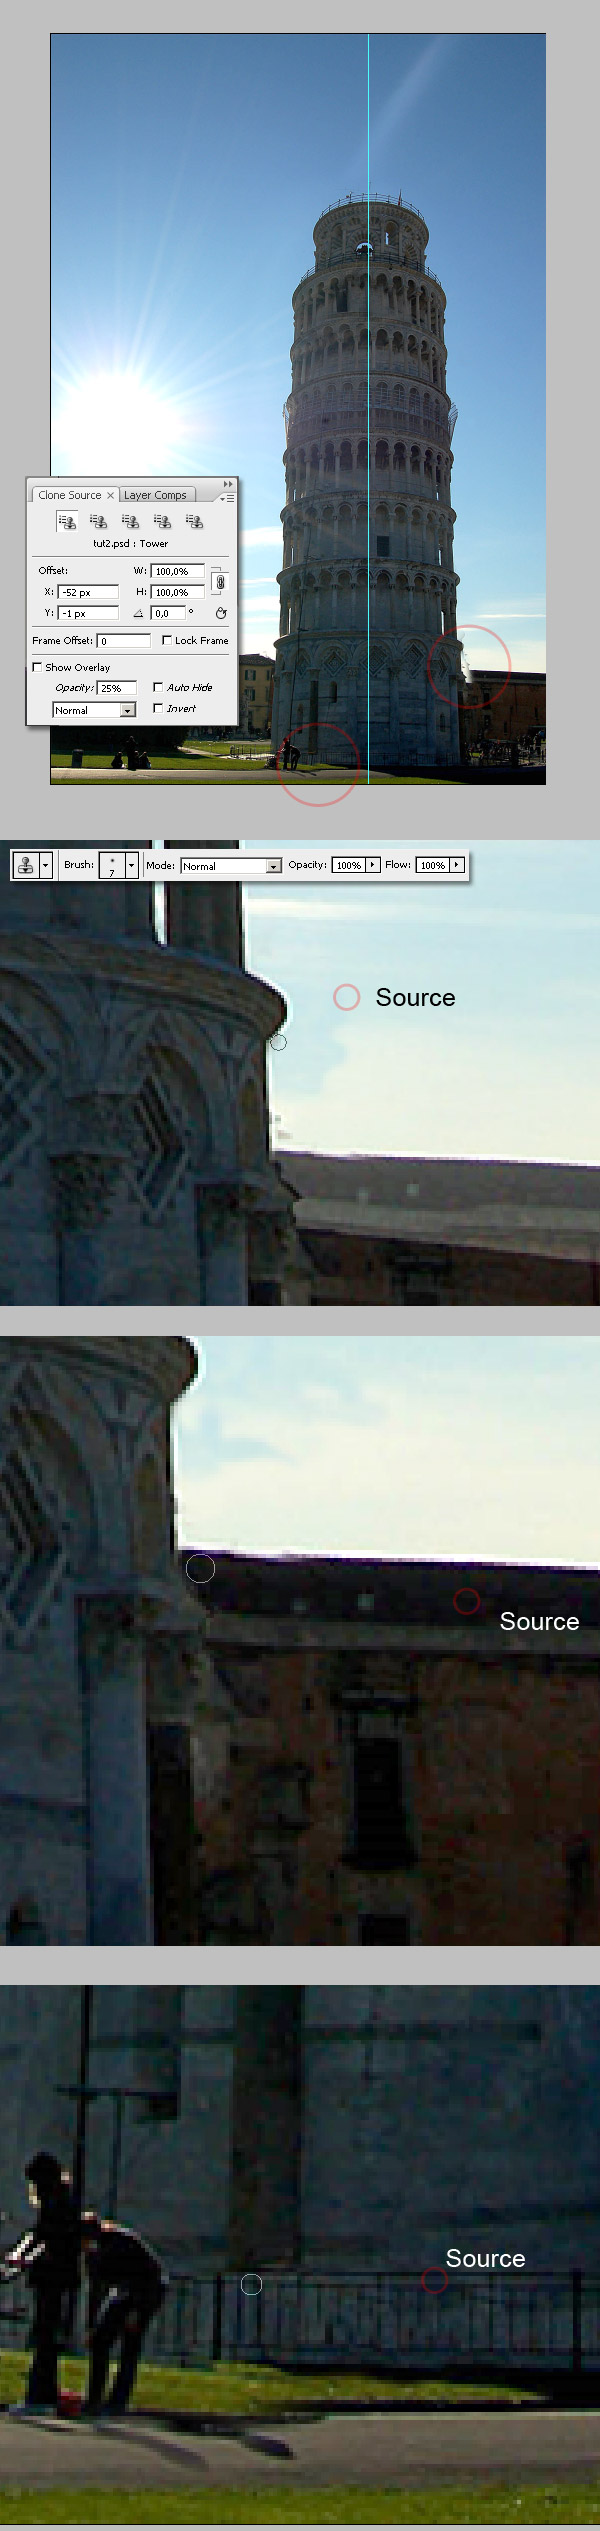
Now select your Clone Source. Select the "Tower" layer and Option-click anywhere at top the left of the tower. Ensure that the Clone Source window is open, just go to Windows > Clone Source to show it.
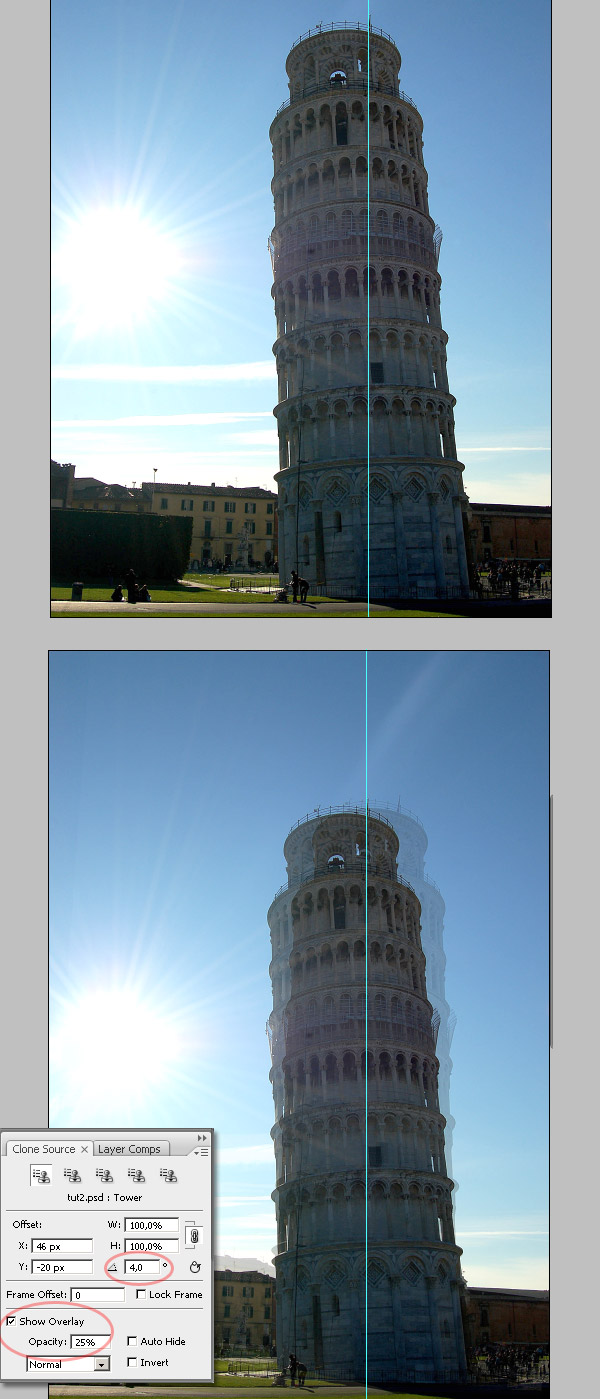
Step 5
Draw a vertical guide to see how your going to modify the tower. In the Clone Source window mark the Show Overlay check box to see the clone source translucent preview. Now here's the trick, just change the Offset angle to around 4,0º. You'll see how the preview is straight now. Do not click anywhere and go to next step.
Step 6
Select the "Straight Tower" layer and just paint over, start from the top of the tower to the bottom, you'll see how the original tower disappears. Stop painting when you get close to the buildings.
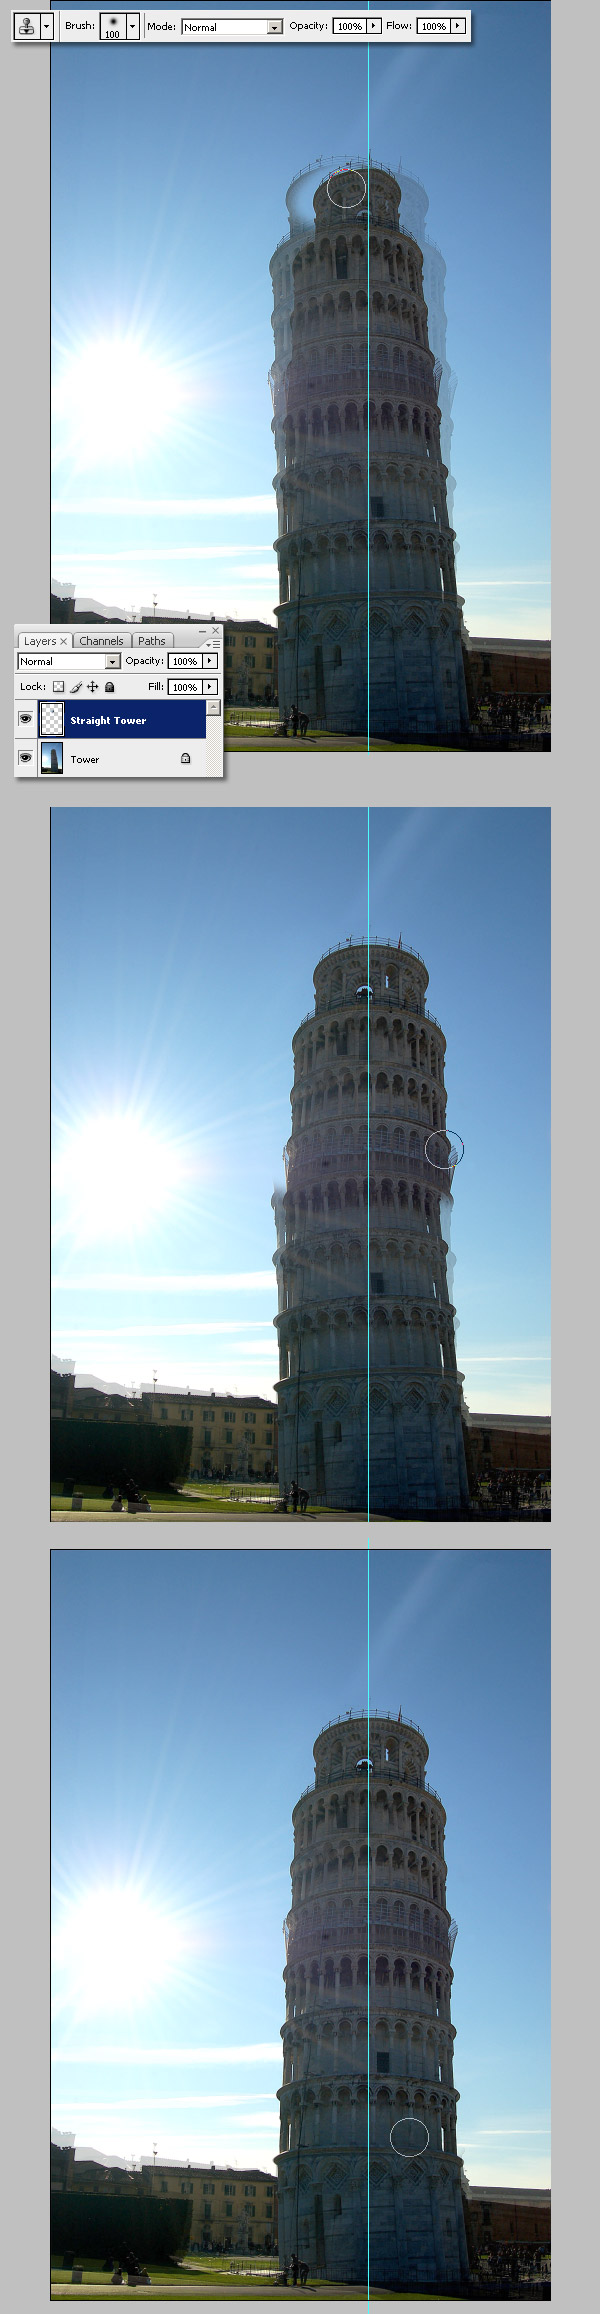
Step 7
Continue cloning but be a little bit more carefully around the tower's base. Reduce the size of the Cloning Brush to clone the borders, nevermind if you clone a little bit of sky over the background buildings, we'll fix it later.
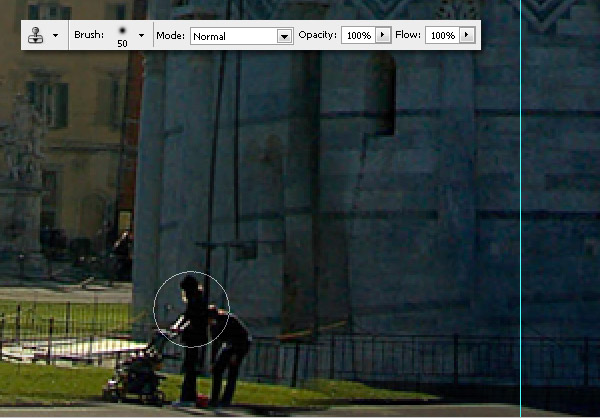
Step 8
In this picture, there's a couple with a baby, clone them too, you'll just move there position a little bit. Again, don't worry about the details yet.
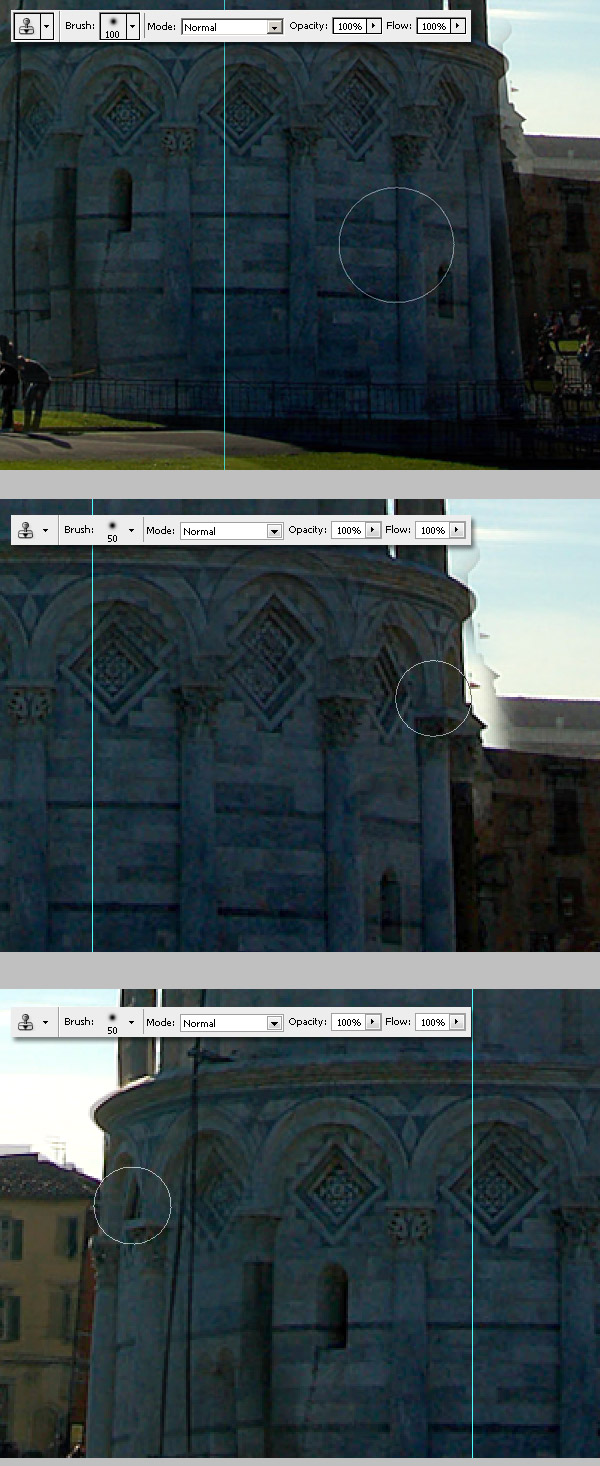
Step 9
Now let's fix all the details. First, we'll improve the sky next to the tower, for this select the "Tower layer", change the Clone Brush size to 7px, set the Offset angle to 0, and select the Clone source somewhere over the sky. Next, select the "Straight tower" layer and paint the sky. Do the same for the buildings, the fence around the tower, or everywhere you'll find any imperfection. Remember, set the Clone source on the "Tower" layer and paint on the "Straight Tower" layer.
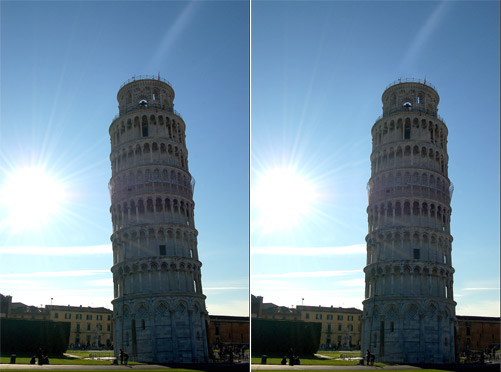
Step 10
You can see the difference in the image below. Then you can Flatten the image and save it as another .jpg file.
Part Two Conclusion
Simple right? You can try this technique on another building. How about leaning the Eiffel Tower instead?. It's up to you now!
Tutorial Conclusion
The Clone Stamp Tool is one of the most useful features of Photoshop, as much for photo editors as for graphic designers. There's no limits for the applications of this wonderful tool!
0 comments:
Post a Comment